While developing applications with Java, you should use a dependency manager to install libraries that your projects need. Two frequency used dependency managers that also serve as build automation tools for Java are Maven and Gradle.
Maven supports archetypes, a way for you to generate a sample project that may give an example of best practices in usage for a library or framework. In this article, you will learn how to create a new Maven project from an archetype in the IntelliJ IDEA IDE.
- Go to “Create New Project” in the IDE. From the sidebar, select “Maven.”
- Add or select the JDK you would like to use via the “Project SDK” drop-down box.
- Check “Create from archetype” and click “Add archetype…”
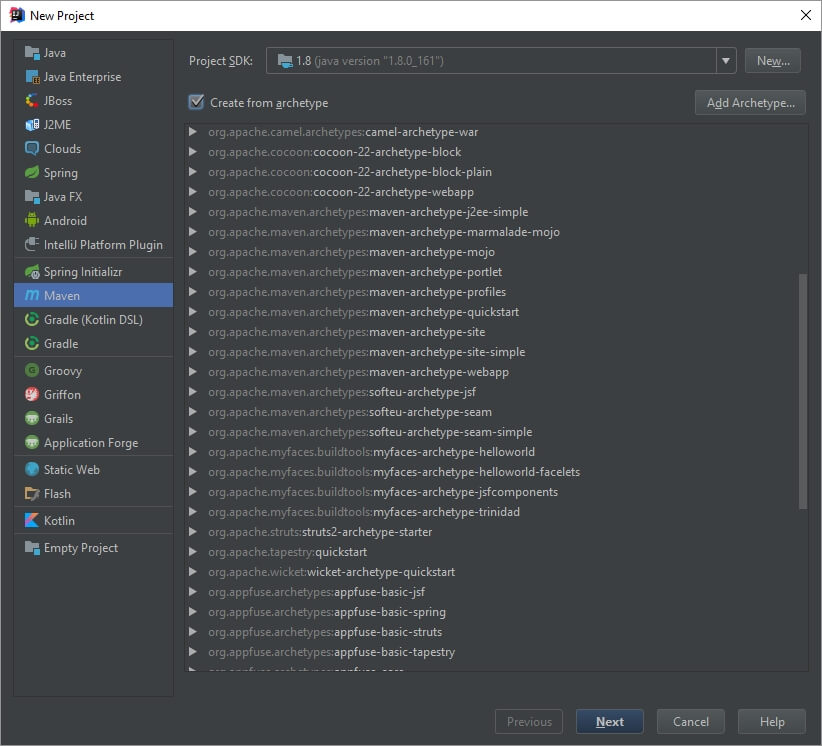
- From the dialog box, you can see the information needed to use an archetype:
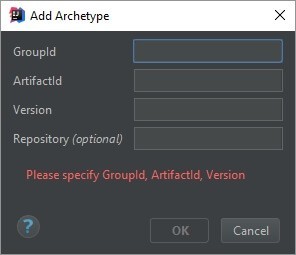
As an example, we will enter an archetype for Ninja, a full-stack web framework. The information and version number for Ninja’s starting point archetype is found on their website.GroupId: org.ninjaframework ArtifactId: ninja-servlet-archetype-simple Version: 6.2.2
After adding the archetype, select it from the main window.
- At this point, you can specify the properties for your Maven project and decide whether to use your own installation of Maven or the bundled version in the IDE.
Finally, you should retrieve dependencies and compile classes for the first run of your project. Open the “Execute Maven Goal” window and type “clean install” to do so. You can also enable auto-importing of dependencies in the IDE.
Comments